Cave Diving Equipment
Hogarthian / DIR Equipment
by Matt London
(article preserved/reproduced from the now defunct ‘Thailand Cave Project Website’, 2004)
The Hogarthian cave diving configuration is the epitome of the minimalist philosophy. This basic system, also known as the Hogarthian system, is the genesis of all DIR diving and while its roots lie clearly within American cave diving during the 1980’sand early 90’s it’s progressive nature remains intact and primarily unchanged even today. The Hogarthian system was originally developed by veteran cave divers William Hogarth Main, Bill Gavin, Sheck Exley, and many others within the Florida cave diving community during the 1980’s.
At that time there was considerable interest in lowering the mortality rate in, a sport that was considered the worlds most dangerous, cave diving! And so this simple but strict, cohesive, bare bones, minimalist type configuration began to develop around a very basic concept eliminate the unnecessary while configuring the necessary in the most streamlined manner possible. What’s truly amazing is how well this very basic concept has stood the test of time. Even today with the more recent and sudden popularity of technical diving and constant equipment and technological advances, the Hogarthian configuration true to form, continues to adapt remarkable well. In fact today’s technical diver is looking progressively more and more like yesterday’ cave diver.:-)
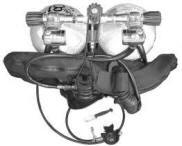
Hogarthian Doubles
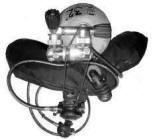
Single cylinder with ‘H’ Valve – Hogarthian regulator set-up
The following is by no means an attempt to fully outline all aspects of this dynamic system. No, that would be nearly impossible and take many volumes, what we will concentrate our efforts on will be the basic fundamentals of the Hogarthian equipment configuration for cave diving as well as some aspects of it’s application in technical and sports diving – Starting with the regulators.
Regulators
First stages

- Balanced/Downstream design assures regulator failure results in “free flow” i.e. diver is never cut off with regards to the gas supply. Balanced firsts breathe easier at extreme depth and/or at lower tank pressures.
- Standard hose fittings only Nothing custom. Standard hose fittings are easier to locate, less expensive to purchase and interchangeable. In some cases the first stage regulator will have a single LP port that is slightly larger then the standard ports, it is better in this case to simply plug this port and use one of the alternative standard LP ports.
- Reliable/easy break down/service /repair A rocket ship delivery is not essential when diving helium based gas mixtures often so-called high performance regulators are less reliable and require servicing more often with parts that are more expensive and harder to find.
- DIN valves DIN style valves are stronger and will deliver 50% better flow rate at depth then the yoke or so called international type valves.
Second Stages
Breathe from the long hose regulator you donate this regulator to an out of air diver while you switch to a back-up attached by a bungee and placed just below the chin (this is of course a well known trademark of the Hogarthian configuration). 
- Reliable/easy break down/service /repair Use only the best materials available, mushroom shaped diaphragm
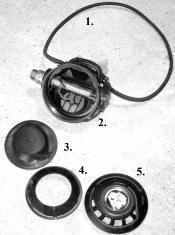 should also be completely accessible with no tools underwater.
- Interchangeable parts – being able to exchange or borrow parts from another regulator when necessary or having one rebuild kit that fits all regulators are two of the best ways to save time, space and hassle at the dive site.
- Stage and deco seconds can be installed “finger-tight” at the LP hose so they can be swapped if necessary while underwater /no tools required (check often).
- Pre-dive check should always include underwater breathing at the surface minimum 4-breaths underwater to check mushroom diaphragm integrity.
- Keep tank valve closed when not in use good way to avoid accidental discharge and associated gas loss.
Always: Before changing over to breathing from a stage/or deco bottle:
- First check and compare both the contents markings on the neck of the cylinder you intend breath from and the MOD label on its side.
- Then with your hand and follow attached cylinder valve to regulator first stage to low pressure hose and then onto the second stage regulator you intend to breathe from. Put this regulator around your neck, open the valve and put the regulator in your mouth. If you can breathe, you are breathing the correct gas.
- Monitor buddy doing the same.
This simple routine is very important as it absolutely ensures the regulator you are about to be breathing from is indeed attached to the correct cylinder before you start breathing from it!
- Dry suit Inflation Gauge and pressure relief valve are required.
Hose Routing
Regulator hoses pointed down and in no hoses should protrude over the top of the valves. This provides additional streamlining while protecting your equipment and hopefully the overhead from damage. It has become standard practice to route the long hose for the diver’s primary second stage from the right valve, down underneath the battery canister, across the chest and then around the neck.
Regulator Hose Lengths
Typical for Hogarthian configured back-mounted doubles and H-valves – standard fittings, nothing should be allowed to dangle! 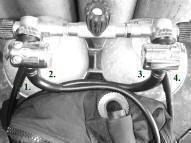
- Primary long hose (never stuffed fastened at right valve) 2.0 cm (1)
- Back up regulator hose on bungee just under neck – 0.60-0.70 cm (3)
- Inflator hoses 0.60 cm (2) Shortest possible without restricting mobility. Normally not more then 0.60 – 0.80 cm
- HP gauge hose 0.60 cm Large diameter corrugated hose on BC – 0.25-35 cm (4)
- Deco/Stage –
- LP 0.70 – 0.90 cm
- HP – 0.10 cm
Gauges
- Same system (metric w/ metric etc) within dive team. – NO mixing
- Back gas – HPG – Brass/Glass are more robust then plastic for primary gas supply.
- Stage regulators – HPG – plastic style smaller size w/ 0.10m HP hose.
Deco Regulators
 For deco bottles only, the hose-less brass stem gauges are desirable as they allow for an ultra low profile and therefore create less drag and because they don’t require an HP hose (an additional failure point). However a full sized gauge is still absolutely required where it’s necessary to continuously monitor gas supplies (i.e.. back-gas and stage-gas regulators). Inflation regulators again gauge is needed for checking suit inflation bottle pressure before getting into the water. Again the hose-less brass stem gauges seem to be the most convenient low profile alternative.
Bottom Timers
Dive computers are not yet used for mixed gas diving in the Hogarthian system. Bottom time provides all necessary information arm mounted and used with tabled rgbm’s. ..:)) Underwater timers. It’s compulsory to have a back-up timer.. Casio G-shock, Iron man etc. are relatively inexpensive and reliable. Both have an audible alarm and can changed between all functions during the course of the dive. Should have 20BAR min. depth rating.
Buoyancy Control
Wings
 Inner bladder guards agent puncture and over-inflation, can also be reinforced with piece of tire inner tube.
- Smaller is better – with regards to the BC wings.:)) Oversized BC problems include increased risk of over-inflation, increased in water resistance or drag and associated overexertion.
- Corrugated hose on the BC only needs to be long enough to allow for oral inflation and discharge of the BC, any additional hose length is unnecessary and difficult to streamline. If this hose is too long it should be refitted with a shorter hose.
- Relief valve should be mounted at bottom left corner of the BC for one handed operation between BC inflator and rear dump valves. NOTE: Any additional relief valves beyond the two described above are not needed and pose an additional failure point to the rig (KIS). Also you can remove any dangling plastic ball from the pull cord and just tie the cord in a square knot (these things can be an entanglement hazard!).
Bungee Cords
There is no way to correctly install bungee cords on a set of BC wings- Remove all bungee cords! Bungee cords placed on the wings can cause problems like lung overloading – during oral inflation and rapid BC deflation and lose of buoyancy – due to a puncture, dislodged relief valve or some other malfunction. It’s also extremely important that the bubble inside the BC is allowed free movement within the BC to offset any additional tools (i.e. stage cylinders, scooters, measuring equipment etc.) added or dropped during the course of the dive. Pull dump style deflation valves that are often mounted where the large corrugated hose attaches to the BC can also be a major failure point and should be avoided. Reports of divers ripping the valve right off the BC are not uncommon.
Backplate / Harness
- Metal aluminum, stainless steel etc. If you don’t need the extra weight then go with the aluminum. PVC BP’s are available and roughly the same weight as the aluminum however thus far, there are no unbreakable PVC back-plates commercially available.
- Crotch strap crotch strap is necessary to hold your equipment securely in place. Standard 2 inch webbing is more popular then the 1′ inch particularly when operating a DPV.:))
- Continuous loop harness One continuous uninterrupted loop of 2 inch webbing is less likely to fail then quick releases.
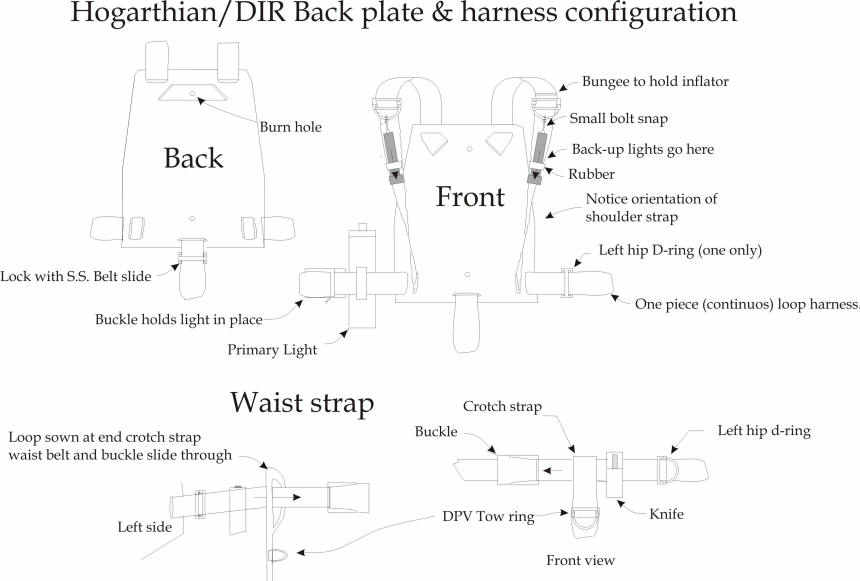
- No quick releases – quick releases are week points and will fail. Quick releases are just not needed when the backplate is correctly threaded with one continuous loop of 2 inch webbing.
- Steel D-rings (plastic will fail)
- D-rings on kit 5 D-rings is standard on the Hogarthian kit (three on backplate harness and two on crotch strap). Four D-rings are all that’s actually necessary for swim dives as the D-ring in front of crotch strap is for DPV use only.
Fins
 Jet Fins/ Rocket fins type These are short stiff fins made from a natural rubber compound with tough metal strap attachment point. This type of fin works excellent for all advanced fining techniques and turns including frog and flutter kicks and tight controlled turns while still providing maximum sensitivity.
- Metal strap buckle avoid plastic quick releases commonly found on most plastic fins.
- Stiffness Fins that are too flexible are not as favorable for the cave environment where turbulence caused by a misplaced or sloppy fin kick could produce a silt out or total loss of visibility.
- Spring straps Are popular and well not break. The rubber straps provided with these can be replaced with stainless steel springs (9-11′ inches length) attached to the metal buckle with cave line and with cave line threaded through the inside (to prevent over stretch). There are also several similar products now available commercially.
Dive Lights
Primary Light
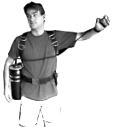 Must be dependable This is the most delicate piece of equipment in cave diving, always first test the primary light in open water.
- Ample illumination 50 watt halogen equivalent min. i.e. 10W HID.
- Burn time Length of dive min.
- Battery canister is stored on right hip just under shoulder – It has become a standard of practice in cave and technical diving to mount the light’s battery canister on waist strap webbing on right hand side. Keeping the canister out of the way, in slip stream (creating no drag or resistance) and easily removed in an emergency.
- Rechargeable batteries less impact to environment and cheaper to operate. Standard 12 volt system is preferred with standard charger connections thus making battery chargers interchangeable between lights in case of failure.
- Easy to repair/ maintain in the field the capability to self maintain and service if necessary is paramount.
- Always carry spare bulbs spare bulbs available at the dive site and close at hand. Keeping a spare bulb in the canister may also be a possibility.
- Tight focused beam is best (6′ degrees spot or less if fixed focus) Adjustable focus beam offers most flexibility. As a general rule the tighter the beam the better for communications during a cave dive. Avoid over-focusing.
Light Matching – Avoid mixing lights
- Team lights should match in size and type. i.e. 10W HID with 10W HID / 50W Halogen with 50W Halogen. Failure to match lights often results in having a detrimental impact on team communications.
Reserve lights (x2)
 Streamlined and out of the way are attached at chest mounted D-rings and fastened to harness with one inch piece of bicycle inner tube. Keep spare section of inner tube attached to harness webbing just at the back plate in case one breaks.
- Easy access- to employ simply pull the light out from under the inner tube. You don’t even have to remove the light for the D-ring unless you want to!
- Disposable batteries alkaline batteries tend to burn out gradually first displaying a yellow gradually weakening light before complete failure (unlike rechargeable batteries which tend to burn out very quickly and without much warning).
- Burn time per light should be equal to or greater then that of the primary light.

- Voltage of the bulb should match the combined voltage of the batteries. Overdriving the bulb stresses the bulb every time you use it and it will fail earlier.
- Always check back-up lights before and after every dive.
Mask
Low volume dive masks work best. Regardless of brand name the dive mask should fit these criteria:
- Low volume to reduce drag
- Wide peripheral vision 90′ – 100′ degrees
- Good seal silicone works best.
- Durable construction avoid easily removable lenses and replace silicone mask strap with neoprene style no break aftermarket type.
Make sure the mask has steel retaining pins for the mask strap. This is the most frequent failure point on the dive mask, plastic pins tend to fail at the most inopportune times! Spare Mask – same as above but always in exposure suit pocket. Doing decompression without a dive mask is difficult. Absolute minimum: one back-up mask per dive team.
Tanks / Cylinders
Back Gas
The size of cylinders depends on several points such as:
 Breathing rate- of both you and your buddy.
- Dive profiles deeper dives will require more gas volume.
- Redundancy how much reserve gas is needed in an emergency?
- Exposure suit diving with heavy steal cylinders in a wetsuit is not safe and in fact a BC depletion failure could be fatal. Redundant buoyancy in the way of dry suit or back-up BC is normally required when diving heavy steal cylinders.
- Personal lifting capacity all SCUBA cylinders are heavy at the surface (some more then others)! Make sure you can carry them comfortably down to the dive site unassisted!
- Buddy – What tanks are your buddy (s) diving with? Matching cylinders makes for easier (and therefore safer) gas turnaround calculations.
- Breathing rate – for both you and your buddy.
- Dive profiles deeper dives will require more gas volume.
- Redundancy how much reserve gas needed in an emergency?
Remove tank boots tank boots, D-rings attached to bands or anything else that might trap rust, increases drag or cause a potential line entrapment should be removed. 300 BAR DIN Valves – DIN valves deliver 50% more gas then yoke style and the additional 30% additional thread depth makes them more secure and therefore preferable to the smaller 200 Bar valve fittings.
Stage/Decompression
- Stage/deco bottles are depth labeled (bold 3-4″ inch numbers) and in cave diving are typically dropped at their MOD to avoid error (in open water bottles are generally carried along).
 Stored on the left side – stage/deco bottles as a general rule are stored on the left side allowing unrestricted access to both primary light battery canister and long hose.
- Stage/deco bottles should be shut off when not in use – as to avoid possible gas loss due to some unobserved regulator free-flow or malfunction.
- Clipped to chest D-ring and left hip D-ring (same attachment point of primary HP gauge) and held close at -the neck and loose in back allowing the cylinder to find it’s way into the slip-stream to prevent drag.
- Aluminum – AL80’s (11.7 liters) are an industry standard. When full these tanks are roughly 1.5 kilos negative (in water) and when completely empty become roughly 1.5 kilos positive. These along with the smaller but same height AL40’s (5.7 liters) are the most popular option for creating a lightweight and balanced dive rig. The use of heavy steel cylinders for stage/deco is generally frowned upon due to increased risk of over weighting.
- Mounting stage/deco bottles on the left side also seems to be the most effective when strong current is present or when diving with a DPV (Diver Propulsion Vehicle), as the bottles tend to find there own way into the slip stream by falling into the breakwater created by the divers body. This translates into less hydrostatic resistance or drag which in turn tends to lower divers gas consumption by lowering energy output requirements.
Always: Before changing over to breathing from a stage/or deco bottle:
- First check and compare both the contents markings on the neck of the cylinder you intend breath from and the MOD label on its side.
- Then with your hand and follow attached cylinder valve to regulator first stage to low pressure hose and then onto the second stage regulator you intend to breathe from. Put this regulator around your neck, open the valve and put the regulator in your mouth. If you can breathe, you are breathing the correct gas.
- Monitor buddy doing the same.
This simple routine is very important as it absolutely ensures the regulator you’re about to be breathing from is indeed attached to the correct cylinder before you start breathing from it!
Valves Manifolds and Knobs
Manifolds
Manifolds allow the diver to combine the gas supply of two cylinders of equivalent gas volume while also allowing the use of two completely redundant regulators should one regulator fail. As a result, a regulator failure does not limit the diver’s access to the total gas supply during exit. Diving with manifolded doubles also simplifies gas management and calculations (when compared to independent doubles). The only exception being solo (not recommended) and side mount diving (requires specialized training), where complete independents make more sense. Note: Never carry a set of doubles by the manifold! – the manifold is made of soft brass for machining, carry the twin set by the two valves or with one hand on a valve and the other on the bottom of the same cylinder so that it can be carried across the chest.
Valves
300 Bar DIN fittings Stronger, more flow, (same as above).
Knobs
Avoid stainless steel or hard plastic knobs as any collision or impact could result in the soft brass spindle to bend or break off making access impossible. A soft rubber style knob with shock adsorption spring will lower the likelihood of this occurring.
Isolators
Isolators give the ability to save half the gas in case of catastrophic gas failure due to a valve or manifold rupture. Some would however argue that the isolator is yet an addition failure point and that the chances of this type of catastrophic gas failure are so remote or nonexistent. Also isolation valve opponents would point out the additional anxieties produced during cylinder filling operations where if an isolation valve were somehow inadvertently closed during filling the diver could end up diving with different mixes in the two cylinders and receive a bad mix (hyperoxic or anoxic) and drown. If you decide that the benefits outweigh the disadvantages then by all means maintain the isolator valve in open position all the times unless needed. NOTE: Check valves often – you must be able to shut the valve down quickly and without assistance (max time – 5 seconds each valve).
DPV’s
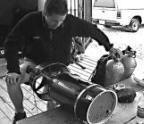 Pull behind type similar to the following – MAKO – for everything above 55M (in emergence can go much deeper though not recommended). GAVIN – for everything below 55M.
- Buoyancy characteristics – both DPV’s have good buoyancy characteristics with the Gavin being slightly positive before weighting and the Mako being perfectly natural in freshwater from factory.
- Tow behind type – provide for better streamlining with less likelihood of entanglement with tools then the ride on top style.
- Interchangeable parts – Many parts are interchangeable between the MAKO and the GAVIN pretty much the same scooter on the inside.
- Reliability Most dependable underwater transportation available for cave and technical diving (so far).
- MAKO is about a third the price of a Gavin with tighter clearances but can’t go as deep.
- Towing – DPV failure procedure:
- Tow-ee grabs the crotch strap of the tow-er. (Make sure to get a good hold under it, do not try holding on to the D ring as this can be a quite uncomfortable)
- Tow-ee establishes neutral to slightly positive buoyancy (negative will create excess drag and slow exit), then tucks in between the tower’s legs who initiates the tow to exit. (tow-ee should stay tucked in with head down because head-up position creates excessive drag!).
- Out of Gas – DPV gas sharing protocols:
- Out of gas diver tows the gas donor (wounded diver always in front) unless the receiver is overly stressed in which case the donor may decide to perform the exiting navigation him/her self.
- Tow Spare DPV – Operating two scooters simultaneously while sharing gas is considered too complex and therefore unsafe. The diver being towed clips spare DPV (if operable) off at his/her standard tow attachment point (rear crotch D-ring) and then grabs the crotch strap of gas receiver who initiates tow to exit.
Bolt Snaps
Bolt snaps are preferred to boat snaps also known as suicide clips due to the tendency of later to randomly attach to guideline, hoses etc.
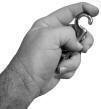 Typical bolt snap sizes for warm water temp 24C+
- HP gauge – ½” inch eye
- Long hose – ¼” inch eye
- Stages – 1″ inch eye
- Spools – double end (small)
- Reels – 1″ eye (soft mount)
- Tables notes – ¼” inch eye
- Scooter – 1″ inch eye
- BU lights – ¼” inch eye
- Typical bolt snap sizes for cold water temp/gloves 24C-
- HP gauge – 1″ eye
- Long hose – 1″ eye
- Stages – 1″ eye
- Spools – double end large
- Reels- 1″ eye (soft mount)
- Tables Notes – ½” eye
- Scooter – 1″ eye
- BU lights – ½” eye
- Avoid any “metal to metal” connections – In case of entrapment you need to be able to cut away any equipment
- Materials considerations – Go for quality. A good quality stainless steal bolt snap requires less maintenance then the ones made of brass.
In general the softer the inner spring the better with regards to the bolt snaps. An extra stiff spring can be frustrating to un-snap and greatly contribute to hand and figure fatigue. Also new snaps should be checked for sharp edges or barbs created during the manufacturing process and if present should be sanded or filed down slightly to insure smooth operation and eliminate any possibility of cutting divers fingers.
Cutting Tool/s
- Required!
 Mounted securely on the webbing just to the right of the main buckle not on divers leg or hoses!
- 1.5 inch blade (40mm) “very sharp” with 3.5 inch handle seems to work the best for cutting guide line.
- Some divers prefer the first .5 inch serrated for sawing, however this is a much more difficult blade to clean or sharpen.
- Diving shears are also popular in technical wreck diving and in some cases can even cut through steel cable!
Line Markers
- Compulsory in cave diving
- Minimum three per diver
Remember: do not leave your personal markers in the cave! Always pick them up on the way back out! Only an uneducated cave diver or an extreme stroke would do this intentionally! Both are potentially dangerous and should be avoided.
Underwater Slates
- PVC-paper great for use in the wet cave environment.
- All dry cave suppliers carry various sizes and styles of inexpensive “wet dry” paper (PVC) notepads for use in cave.
- Normally carried in a slate pocket (right side) on exposure suit.
- Can be cut to size from rigid PVC or Acrylic sheeting for mapping projects.
 Decompression Tables
- Deep stop RGBM based decompression tables – or any hobby ware look alike.
Water Bottle
- For Hydration before during and just after the dive.
- Small water bottle with lift spout works best for one handed delivery and fits in bellow pocket.
- Nice for the deco and time at surface just before and after the dive, just make sure you practice first in the pool!
- For longer exposures try adding 20% fresh tangerine juice.
- In addition a discharge valve (or zipper) is an absolute must for optimal decompression diving!
Pockets
 Two pockets – One for slates and one for tools is standard.
- Larger billow pocket mounted left side under shoulder just above knee. This is the same side as the stage/deco cylinders are stored so the bigger tool pocket is in the slip (see tanks/cylinders above) and streamlined. Also allows in flight access while on a DPV .
- Be careful to attach the pocket low and on the side (just off the knee with top at finger tips) and out of the way of the stage/deco cylinders.
- Slimmer slate pocket Mounted right side under should just off the knee. Decompression tables etc. go here.
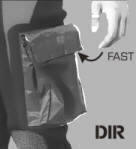 The slate pocket goes on the right side position and while still well within the slip-stream this side tends to be more exposed when in current making the lower profile and more streamlined slate pocket a better choice for this side when compared with the larger billow pocket.
- Also this pocket tends to be used more during the decompression phase of the dive at time when you are unlikely to have the DPV parked.
Your Body
Perhaps the most important piece of dive equipment is your body. Keeping you body in good shape, watching your weight, maintaining a good balanced diet with plenty of sleep and staying well hydrated can have a positive impact on ones stamina, mental sharpness and decompression.
DSMB (delayed surface marker buoy)
Required for all off shore dives should have over pressure relief valve as to allow SMB to be launched from depth during decompression or in case of emergency.
Safety Spools
 Also known as the finger spool:
- One back-up per diver minimum – To facilitate in emergency searches etc.
in addition to/and should not be send an SMB to the surface during decompressing or perhaps used for patching a broken lines etc.

